Saturday, April 30, 2011

Saying Goodbye & A Gift

Kiko waiting for her presents


A double blog post today because in all this sadness came a beautiful and unexpected gift that I want to share.

My best friend and puppy of 14 years had to be put to sleep yesterday. I labored over the decision and knew when I looked into her eyes and felt the energy she threw at me that she was in serious pain. I knew I was being a selfish friend. It was time to let her go and I did.

She was my friend and companion. A funny little host to guests and friends. The biggest kid waiting for her presents at Christmas and an excellent watchdog and cat chaser. She never did stop hating Guy our neighbor. Why she hated him so, I'll never know and she takes her reasons to the grave.

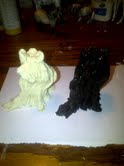
I put off digging her grave this morning. I just didn't want to finalize this event. I've been fortunate enough to have a backyard in Brooklyn. A little garden and grass to play and plant and when my pets died I'd always bury them. It was with much sadness that this last grave I dug here in Brooklyn before I leave had to be for my beloved Kiko, but alas, it's what the Universe and God wanted at this point in time. The hard work and sadness of the action wasn't without reward though. Two feet down before my very eyes was a gift. A gift most fitting for someone like me and perhaps a message from my little one who loved to get as dirty as I did in the mud. A message to keep creating no matter what.

The gift of clay.

I've dug several pet graves
and an underground kiln.
Today was the first day
I ever hit clay in the backyard.

Changing the Plate

Sanding down the section
that will be changed.


So, the more I looked at this piece, the more I hated the section on the bottom right hand side. Extending her hair all the way to the edge was a last minute decision after I had pulled the tape off and noticed I blocked off the illustration strangely. Adding hair was one solution, but not a very good one. After drawing out the other three plates I decided I should square up the bottom of "Fall" and add stalks so there would be unity throughout the series.

Making changes on quality bristol is fairly easy since the paper can withstand a lot of wear and tear. The first step to change is to sand away a portion of the illustration in order to eliminate bumps and seams so the new painting sits flat. Once sanded a Prismacolor pencil is used to draw in new stalks and then those are painted using acrylics. The acrylics dry very fast and color can be quickly blocked in. After which, oils can be used for detailing and blending.

I believe in the end the change helped the illustration. Btw, a few people asked what kind of tape I'm using to block out the illustrations. That tape is 3M Painter's Blue Tape. All paint stores carry it and it's fantastic since it can be reused a few times and it sticks but doesn't pull the paper when removed.

Drawing in the stalks.


Masking out the area and painting.


Finished section.

Tuesday, April 26, 2011

More New Stuff

Sharing some of the resin pieces I've been painting. The Olivers are both commissions. The Lil Pumpkin will be an item that will be up for sale shortly. This Lil Pumpkin is the only one being offered as a gelding (all the rest are mares) and with minor changes (bows). I honestly don't know if I'll be able to finish out the artist choice run on this sculpture. This may actually be the last AC I offer to the public.

Lil Pumpkin sculpture
with bows and base


Lil Pumpkin sculpture
with bows.


"Oliver" resin in buckskin tobiano.


"Oliver" resin with base.


"Oliver" resin in chestnut.


"Oliver" resin head detail.

Monday, April 25, 2011

Season Plates

Four plates together


This weekend I worked on laying out the last three illustrations for The Four Season plates. I love the way they all came out. I'm letting my eyes rest a bit before I start adding paint. Once I start adding paint things really start to change. I should scan each one properly in case I mess up something in the painting stage (like I did with Clytie's hands a few weeks ago). Once I paint over the drawing I'm lost for a spell.

Winter


Summer


Spring

Wednesday, April 20, 2011

Base Work

Over the weekend I transferred the "Summer" illustration plate to bristol. Normally after I transfer the pencil drawings I start right in on the painting, but for some reason I needed to let this one sit for a spell. There are several components to the illustration and I need to make sure I am correct in my thinking about visual flow. I'm also being a bit timid about putting paint to paper as I love the drawing and hate reaching the point of no return where the pencil drawing is gone and the paints have taken over and nothing looks right yet.

While this piece sits I have been diving into some base work. As I was going along with the base for a Lil Pumpkin piece I'll be offering soon, the painting of the tree stump took on the feel of a short visual tutorial so I quickly documented it. It might be of some help to someone struggling with painting props.

Raw resin tree
and a prepped tree


Adding paint using
a dry brush


Start with the darkest color first. Paint the entire piece allowing paint to get into the crevices. This application is a wet application and applied as you would normally apply paint to an object. Let dry fully. At this stage the piece is not suppose to look good.

After the first layer has dried saturate a stiff brush with the next color. (Which should be lighter than the first.) Immediately blot this paint off the brush and onto a dry paper towel. Keep blotting till only a bit of paint comes off the brush and apply the color to the prop. Application should feel "dry" and not slick. Continue to add lighter colors in this fashion. Keep applying paint to the brush and blotting on clean sections of your paper towel. If you feel the colors aren't working or can't get a feel for the dry brush technique right off the bat just repaint the prop and start over. Use a hair dryer to dry in between layers.

Keep adding color.
Layers get lighter as you paint.


All three pieces together
on one base

Friday, April 15, 2011

Derailed

My gal Lucy


I've been slightly derailed this week. Found my sweet hen had fallen into the fish pond and apparently broke her neck. By the time I found her she was half drowned. (And yes, I have 2 canisters of fresh water out for the hens as they free range...just in case you're wondering.) It was a shock and it upset me both creatively and personally. She was my favorite pet chicken. Something very special happened to me in November of last year that sorta revolved around her so she always held a very special place in my heart. I hate when pets pass on but when they hold a special place or have a great story behind them (she was the chick that got pecked on the most in the bunch who became the boss hen) it's harder when they go.

Before the derailment though I had managed to find a home for my beautiful Mercedes Boy and created a pretty base for him and managed to get fairly far production wise on three Sarah Mink "Oliver" resins. "Oliver" is a ton of fun to paint and the appy "Oliver" will be a sales item hopefully next week or after Easter. I'm also full force into production on "The Four Seasons" illustrations and have decided to start the "Summer" plate this coming weekend. I'm most inspired by this one and too excited to see how it turns out so I must start it asap.

Mercedes Boy with new base


Oliver resins. Appy will be
a sales item soon